Installation and Precautions

Movie

  • Basic Cutting Method (Flat Surface)
    Cutting Method
  • Cutting Long side (Flat Surface / 606mm)
    Cutting Method
  • Cutting a Hole for Air Conditioning Duct (Flat Surface)
    Cutting Method
  • Cutting L-Shape (Flat Surface)
    Cutting Method
  • Basic Cutting Method (Mosaic / Border)
    Cutting Method
  • Cutting a Hole for Power Outlet and Switch (Flat Surface)
    Cutting Method
  • Cutting a Hole for Power Outlet and Switch (Mosaic / Border)
    Cutting Method
  • STONE GRACE / 606x303mm with 1mm Joint
    Installation Method
  • GRANAS VAGUE / with Pattern
    Installation Method
  • PEARL MASK / with Back Net and Pattern
    Installation Method

Installation Method (Adhesive Work)

Preparation

  • Avoid the use of strongly adhering protective tape that may hurt the product’s surface.
  • Use the dedicated adhesive (SUPER-ECONUR G).

Step 1. Check the Backing

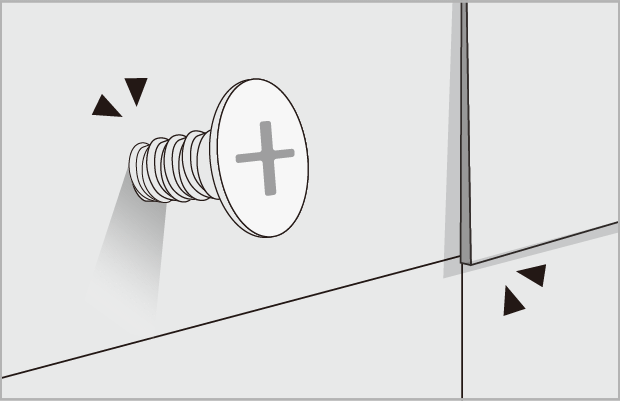
Check for any unevenness of the backing, and repair any sites of excessively uneven backing with putty. No nails or screw heads should protrude from the backing surface.
*See “Backing Suited for Installation” below.
Remodeling work
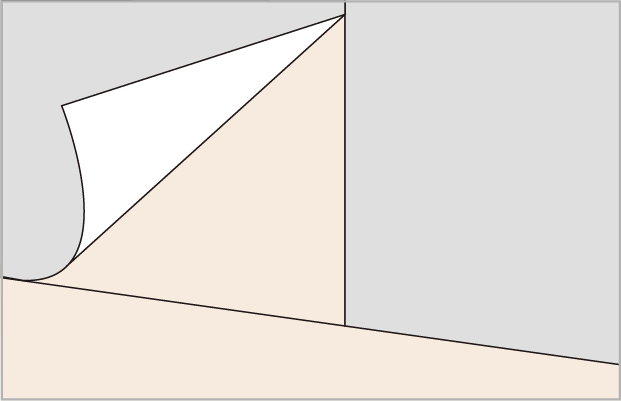
For the installation of ECOCARAT directly over wallpaper, buttress the backing with a stapling gun with staples spaced at 455 mm.
*Some existing wallpaper finishes on walls do not enable adhesion to such wallpaper.
Be sure to confirm successful adhesion before proceeding.

Step 2. Tile Sizing (Straight Cuts)

Use a pencil cutter, plastic board cutter, or rotary cutter and draw a straight incision for splitting.
The piece can be split by pressing down on one side hanging over a square-edged table, or by using both hands to respectively press and fold each side.
Smoothen the cut surface by hand with a sander.

Step 3. Apply Adhesive

Spread adhesive fully across the entire surface of the backing with a toothed trowel.
Create a combed pattern of the spread adhesive with the toothed trowel, aligned to horizontal or vertical line markings.
*The recommended comb depth differs according to the selected style of ECOCARAT. Please confirm with the “Table of Recommended Comb Depth”

Keep the application area at no more than 1.5 m² each time. The reference time for work to mount the pieces after spreading adhesive is 15 minutes.

Step 4. Mounting

Press ECOCARAT pieces by kneading into the adhesive by hand.
Joints should be aligned according to the specific product specifications.
*ECOCARAT styles vary between abutted installation and requiring joint-aligned installation.
*Any adhesive that squeezes out of a joint should be removed with a spatula or similar item.

Step 5. Inspect the Finish

Remove any blemishes.
Handprints can be rubbed off with a plastic eraser.
Any adhesive residue on the surface should be quickly wiped off with a moistened cloth before it hardens.

Backing Suited for Installation

Backing Material Suitable Conditions or Features
Plasterboard Standard gypsum board
Fire-Resistant Gypsum Board
Thickness 9.5 mm or more, also called gypsum board
Thickness 9.5 mm or more, high fireproof characteristic
Gypsum Sheathing Board Thickness 9.5 mm or more, not permitted for backing in wet areas, but high humidity is allowed
Plywood Normal plywood
Structural plywood
Thickness 9 mm or more, Class I JAS standard F****
backing in Thickness 9 mm or more, Special Class, Class I JAS standard F****
Notes 1. Screw spacing should be 150 mm or less to prevent warping, and furring strip spacing at about 303 mm.
2. For lightweight steel-framed backing, the studs should be spaced at about 303 mm. Apply joint tape (FATAPE-100) to the vertical and horizontal joints of the backing.
Fiber reinforced
cement board
Calcium silicate board Specific gravity 1.0, thickness 6 mm or more
Notes For lightweight steel-framed backing, the studs should be spaced at about 303 mm. Apply joint tape (FATAPE-100) to the vertical and horizontal joints of the backing.
Cement types Concrete and mortar backing Gapping of 0.5 to 1 mm should be established for products sized 303 x 303 mm or 303 x 455 mm.
Extruded cement board
ALC panel
Fit the pieces within each panel.
  • ◎ Suitable
  • ◯ Suitable with provisos
  • *Surface precision shall be held within ±1.0 mm/2 m.

Table of Recommended Comb Depth /
Standard Usage Amounts for Adhesive

Set of Installation Tools

Required Tools

Toothed trowel (3 mm, 5 mm) for spreading adhesive
(LKT-3、LKT-5)
Starter kit: tool set
(ECT-P7)

Useful Tools When Available

Tile nipper for L-shaped and U-shaped cuts
Plastic board cutter: straight cuts
(Example: OLFA P Cutter made by OLFA)
Circular saw (HPT) C46YA2 (N)
Use polystyrene foam as a bed during cutting. Do not cut over plywood, which can smoke.
Diamond Wheel 80(DW-80ECO)
For a power tool, the Hitachi C4YA2(N) sawdust-collecting circular saw is recommended for a sharply finished cut and easy connection to a dust collector. The wheel can also be attached to a hand cutter (e.g., Makita 4104BASP).
Makita Trimmer 3706BSK
Trimmer bit ECTB-3D
(The trimmer bit is for Makita only)
Makita Laminate Trimmer 3706BSK (with adapter for 6mm dia. → 3 mm dia.)
Otherwise, attach adapter 6 (Makita part no. 322067-1) to model no. 3707F.
Slim Angle Grinder
Polystyrene foam sheet

Placement Rules for Product Varieties